Monthly Archives: March 2014

ASPARAGUS – The great skinny spears. Still buying mine.

One week until the Charlottesville farmers Market kicks off an 8+ month
run downtown . See https://www.facebook.com/CharlottesvilleCityMarket .
One of the things I look forward to in the first few weeks of the market
is spring asparagus ( beets too) . My current garden doesn’t work for
growing my own asparagus (though I may do this with some friends in their
garden.    

Image

Young asparagus spears – READY !

Asparagus is a perennial vegetable that pops up every spring , but
unlike much of the rest of the KITCHEN GARDEN it takes a few years to
enjoy the benefits of these delicious spears.

Root crowns are planted in spring or fall and prepared to grow BUT can
not be harvested until the 3rd ( maybe some 2nd ) year. So we must learn
some patience and remember that THIS SPACE IS TAKEN.

So we care for “nothing” while harvesting beans and cukes and tomatoes
throughout the garden. BUT on the plus side- Well planted and cared for
plants can be productive for up to 20 years.

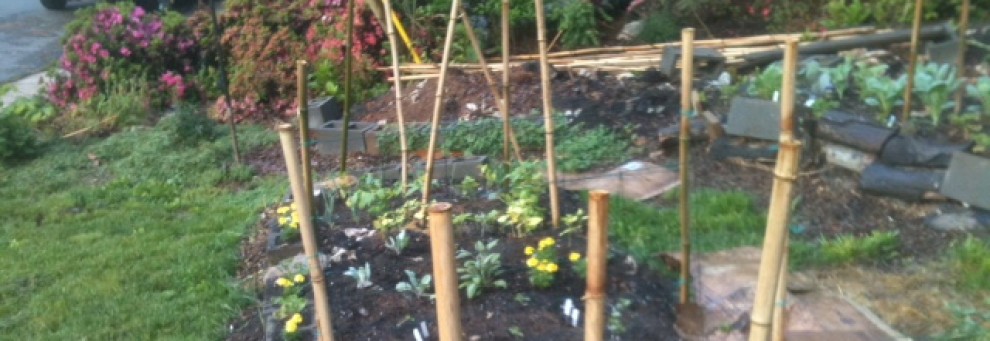
Aparagus is planted as “crowns” (year old plants) in a clean garden bed
in trenches 6″-12″ deep and separated 18″-24″ . The soil should be well
drained as the plants don’t like to have WET-FEET. Dig the trench and
work in 3-6″ of compost, manure and/or soil mix. Spread the soil in a
ridge in the trench. Place the “crowns” on this ridge spreading the roots
over mounded soil.        Cover with enough well composted soil and mulch 4-6″
and water well.

Image

Asparagus crowns ready to be set.

YEAR 1

Do not harvest the spears in the first year, allow them to grow and cut
down dead foliage in the fall. At cutting top dress with compost.

During this year letting the asparagus go to seed will give the crown a
chance to establish and get strong. This will set it ( and you) for long
time supply of spears.

YEAR 2
During the second year, keep the bed thickly mulched, side-dress with
compost/manure in spring and early fall, and cut down dead foliage in
late fall. You may be able to harvest and enjoy a meal of two of spears.


Image

Asparagus plants- fueling and replenishing the crowns.

YEAR 3
YUMMMMMMMM!
The asparagus can be harvested for a relativley short period (2-3 weeks)as soon as the spears start to show. You will want to keep a close eye on the bed, Clean it after winter so mulch and debris are not too deep. After harvest allow the “ferns” to grow- these plants feed the crowns/roots for future spear production.

Found a few blogs with similar info. ENJOY !!

Growing Asparagus


How to Grow Asparagus

Deer Do Not Like Eggs- Offer them an Omelette and they will Leave.

Here is a Mix ( and a variation or two) that will be effective in repelling most deer from your garden.

Eggs make powerful stinky impact on deer and keep them away. young deer

Both the white( proteins) and and sulfur in the yolk are problems for the deer and will send them to the neighbors.

In a gallon jug:

Water
4 eggs ( scrammbled) and shells(crushed)
4 Tbs dish soap

1. Place the mix in loosely sealed container and place in sun for 2-3 days.
2. After 2-3 days pour/strain through cheesecloth or knee high stocking(Dollar store)
3.Store in the jug, covered tightly- out of the sun
4. Spray on plants from bottom to top
**5. Re-Apply after rain

The solids that are strained out should also be put out on the perimeter to deter the deer.

OPTIONS:

You can add either –

A]3-4 crushed garlic cloves at the beginning.
or
B] 4-6 Tbs hot sauce OR 4 chopped hot peppers

C] 4 tbs whole milk

Another option is to make a new batch every few weeks and alternate the EXTRAS- Add milk for the first round. Add garlic for the second round and pepper for the 3rd.

You could add all at the same time BUT the rotation will keep the deer aware of the smells and not develop a tolerance and just ignore it and come in for the snack.

Beautiful Deer -Unwelcome Visitors in The Garden

Deer are beautiful creatures and they roam freely throughout the USA and they can be challenging co-habitants of our gardens. They love to eat our greenery and fruits and generally wreak havoc in gardens and landscapes. BUT the buffet can be limited. 

FIRST THINGS FIRST-Unless you plan on building a FORTRESS of Solitude, Accept some losses and share with our fuzzy friends.

Image

Young deer- looking for food?

Now that you accepted that premise what can you do to the  limit losses?

There are 3 basics- Barriers, Repellents,  and Scare tactics.

1. One option is to use less “tasty” plants in the garden BUT since many of the deer faves are also ours we need to plant to block their lunch.  

Barriers –   A.  Plant large, sprawling deer repellent varieties such as thick hedges of boxwoods or short needle spruces around the borders of your garden.

B. Plant hairy or thorny plants on the perimeter and near crops you want to protect. Plants like fuzzy lamb’s ear, barberries, and cleome are a good place to start. One perimeter location to focus on is any entrance spot. Though roses are a favored snack- some roses are particularly thorny, built for self-defense and are an attractive fence.

Image

Jumping a Low fence

C. The obvious barrier option is to install a fence at least 6 feet high but since deer are capable jumpers a fence of 7-9 feet would be useful.

Repellents – 1. The first step is to plant strongly scented herbs—garlic, chives, mint and lavender (left)—can mask the appealing aroma of nearby snacks.  Many of these are also useful in the garden to prevent many insects. AND they are delicious and useful crops.

 2. There are some specific repellents to make and use that include

*fabric softener strips and/or wrapped bars of soap from trees

*hot pepper sprays 

*garlic and rotten egg mixtures

*ammonia soaked rags

*bags of hair ( or spread on the ground)  {call your barber/hairdresser} 

*blood meal
Most these are applied as a spray and should be covered from the ground and up the plants and around the perimeter. Most of these are water soluble and should be reapplied after rainfall. It may also be a good idea to rotate the sprays so the deer don’t develop a tolerance to the irritants.  Many of these are available in commercially packaged formulas. 

Most of these are water soluble and should be reapplied after rainfall. It may also be a good idea to rotate the sprays so the deer don’t develop a tolerance to the irritants.

Image

Still healthy without Your smorgasbord.

Building Good garden Soil

The key to delicious garden grown food is healthy and strong soil.
The key to healthy /strong soil is building it up with mulch, compost and recruiting worms and other useful organisms.

1) Minimize tilling and digging. [keeps good soil structure-and weeds]
2) Use compost, grass clippings,leaves/leaf mold and organic mulches (will help and improve the soil structure and texture)
3) Always keep the soil covered with crops* or organic mulch.

*Whenever you are not growing a crop, sow a cover crop to keep the soil active and fed or cover with good compost and mulch.

Build and rebuild the soil- The best way to do this is composting and worms. Invite the worms to your soil with good amendments and plenty of “food” (decomposing food scraps and vegetation)

GREEN Manure (cover crop)- Grow in empty spaces- between seasons- during a down year to rest/recharge the soil or to overwinter; after cut back and work into the soil before the plants go to seed. Cut back with mower, clippers or scythe, leave on ground or remove and top the area with compost or leaf mold and prepare for planting. Cut material can be added to compost pile.

As the garden is being developed you will need to add a source of phosphorus. Crops with enough phosphorus show steady strong growth. This means more and vigorous production of crops. Strong mature are less susceptible to drought,disease and frost. Rock Phosphate is also rich in other needed elements such as boron, zinc, nickel and iodine. It is also a slow-releasing long-term food and it is bio-available to the plants and soil.

LEEKS – Growing Leeks for a Delicious addition to the Garden and Kitchen

Planning on adding Leeks to the garden to share the space with onions and garlic( as well as the tomatoes/basil and other delicious goodies)

Leeks (Allium ampeloprasum var. porrum) are fun plant and beautiful plant in the garden and a delicious addition to the kitchen- they can also be stored over the winter for some delicious garden freshness during the snowy season.

Image

Leek Seedlings for Transplant


Image

Trench for row of Leeks

Leeks are easily started in soil-less mix. When they reach the thickness of a pencil, they can be transplanted outdoors(they can also be purchased in pots with several seedlings per pot).

Grow them in soil that has plenty of compost and nitrogen.Add manure throughout the growing seaqson to feed and grow.
• Water and weekly
• As they grow add some material around the stem every 2 weeks or so to blanch the plant. Add about 1 inch every time. The mix can be soil.mulch,compost,manure (make a mix)

Space leeks 6 inches apart.

Image

Leeks growing to maturity

To produce a tasty white stem, leeks must be blanched—in.This is done by protecting them from the sun- To do this, plant leeks into deep holes 6-7 inches deep. This can be in a trench or individual holes. Plant to the depth of the first GREEN leaf

Let a few leeks in the garden go ahead to set seed. They grow a good looking starburst of tiny whitish flowers on a long stem. When the flower opens it will take a few weeks until the tiny black seeds are mature.


Image

Mature and going/Growing to seed

Link

Plan and Plant Your Garden for Non-Stop Veggies- Like a Tasty Buffet

Plan and Plant Your Garden for Non-Stop Veggies- Like a Tasty Buffet

I have been gardening for a number of years and have been reading about it, watching TV / now online videos about it. It is a lot of fun and interesting AND OF COURSE DELICIOUS- but I am learning to make the most of all my efforts and fill the fridge and {now learning to make fermented veggies- KIMCHi/ kraut etc}

I recently read an article about SUCCESSION PLANTING  and was intrigued- I  realized i read about it before but never “caught” it before. Now I am making a plan to try it this year and season.  

Onions, greens, cabbage family plants will be my first trial partners.

* I like this article about Doubling the harvest. I am also adding some of the books mentioned( that I don;t have now)

http://www.gardeners.com/Succession-Planting/5016,default,pg.html 

** I have been experimenting with Square Foot gardening and some of the ideas in Mel Bartholomew books and website, but not the succession planting ideas( I reread a few pages just a few minutes ago.

http://www.dummies.com/how-to/content/growing-vegetables-by-succession-planting-and-squa.html

^***And one more i found that has a lot of great info- i will download and use for my plans and hopefully for my kitchen ( even share/barter with friends)

http://www.growingformarket.com/articles/Try-Succession-Planting


Flooding June 7 2013 B

Baked Beans- Great Fuel

I bought some molasses the other day for something I was doing but bought a bigger bottle and always love to make slow cooked baked beans.  I don’t have a proper baked bean pot- I keep looking at thrift store- but i have a covered casserole

I used onions, cabbage 2 kinds of beans ( canned for speed) plus some seasonings.

Preheat oven to 325.

1 can  each BLACK BEANS and KIDNEY BEANS   (drained)       

Image

-4 TBS Blackstrap Molasses 

-fresh black pepper

-garlic(minced) and garlic powder

-chili pepper flakes

2 yellow onions ,sliced in half rings

1/2 small green cabbage shredded small 

Image1.Mix the beans with molasses and seasoning ( maybe a little of the liquid drained).

2. Place a layer of onion “rings” and cabbage on bottom of dish

3. Add half of the bean mixture

4. Place another layer of onions and cabbage.

5. Add the rest of the bean mixture and top with some shredded cabbage

6. Put lid on casserole

7. place in oven for 3 hours

Serve with salad and whole grain bread or rolls. I also ate the leftoers on top of cook whole grain farro / brown rice.

Image

2nd layer of onionImage

Image

casserole ready for the oven-2 layers beans/onions/cabbage